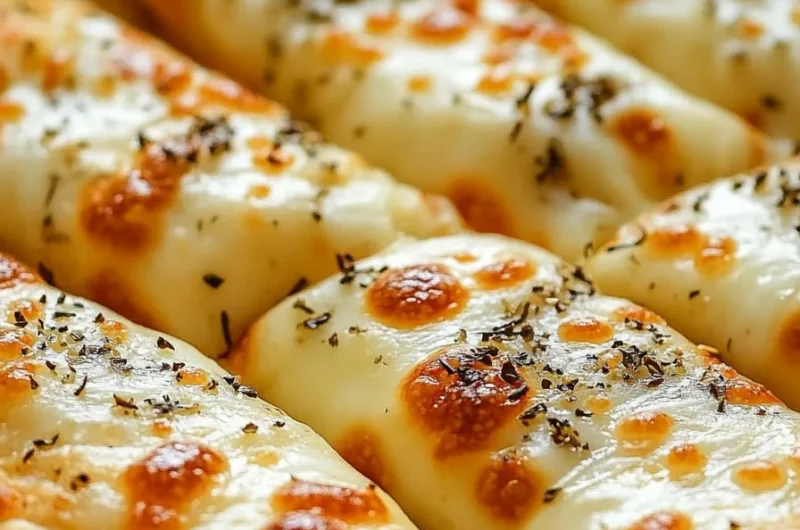
Homemade Cheesy Breadsticks are an incredible treat perfect for any occasion. With their warm, gooey cheesy goodness and a delightful crunch, these breadsticks never fail to impress. They are simple enough for a weeknight snack yet delicious enough to serve at parties or family gatherings. From the moment they come out of the oven, the aroma of melted cheese and herbs fills your kitchen, enticing everyone to grab a piece.
If you’ve ever enjoyed cheesy breadsticks at your favorite Italian restaurant, you know how hard it can be to resist the cheesy goodness. These homemade versions take it up a notch, using fresh ingredients and your choice of cheese for a flavor that can’t be beaten. In this article, you will learn why this recipe is so special, the time it takes to prepare, the ingredients needed, and, of course, detailed instructions to make them perfectly.
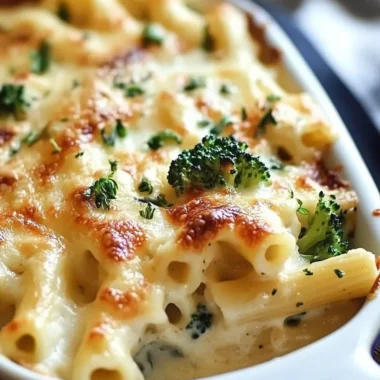
Whether served alongside a savory pasta dish, a salad, or simply enjoyed on their own, Homemade Cheesy Breadsticks will become a beloved staple in your home. Your family and friends will rave about them, and you’ll love how easy they are to make. Get ready to dive into this wonderful recipe that combines comfort, flavor, and fun!
Why You’ll Love This Recipe
Homemade Cheesy Breadsticks are not just about delicious cheese and bread; they bring a delightful experience with every bite. Here’s why you’ll fall head over heels for this recipe:
1. Easy to Make – You don’t need to be a professional baker to whip up these cheesy delights. The steps are straightforward and user-friendly.
2. Customizable – Adjust the cheese varieties and seasonings to cater to your taste preferences. From mozzarella to cheddar, the choices are endless!
3. Family-Friendly – Kids and adults alike will love these cheesy snacks, making them perfect for family gatherings or game days.
4. Perfect for Dipping – Pair them with marinara sauce, ranch dressing, or any of your favorite dips.
5. Quick Preparation – These breadsticks require minimal prep and cooking time, giving you more time to enjoy and less time in the kitchen.
6. Impressive Presentation – The golden-brown crispy edges and melted cheese are sure to impress anyone you serve them to.
With all of these amazing benefits, it’s no wonder that Homemade Cheesy Breadsticks are a go-to recipe in many households. The flavor, texture, and overall joy they bring make them a must-try!
Preparation and Cooking Time
Creating the perfect Homemade Cheesy Breadsticks doesn’t take long, and you’ll enjoy the entire process. Below is a breakdown of the time needed:
– Preparation Time: 20 minutes
– Cooking Time: 15-20 minutes
– Total Time: Approximately 35-40 minutes
These times may vary slightly depending on your oven and experience, but this guideline will give you a solid base to work from.
Ingredients
– 2 cups all-purpose flour
– 1 tablespoon instant yeast
– 1 teaspoon sugar
– 1 teaspoon salt
– ¾ cup warm water (about 110°F)
– 1 tablespoon olive oil
– 1 cup shredded mozzarella cheese
– ½ cup grated Parmesan cheese
– 1 teaspoon garlic powder
– 1 teaspoon Italian seasoning
– 2 tablespoons melted butter (for brushing)
– Fresh parsley or basil (for garnish, optional)
Step-by-Step Instructions
Making Homemade Cheesy Breadsticks is a breeze when you follow these step-by-step instructions:
1. Preheat your oven to 425°F (220°C). Line a baking sheet with parchment paper for easy removal of the breadsticks.
2. Mix Dry Ingredients: In a large mixing bowl, combine the all-purpose flour, instant yeast, sugar, and salt. Mix well until uniformly blended.
3. Add Wet Ingredients: Slowly pour warm water and olive oil into the dry ingredients. Stir until a dough begins to form.
4. Knead the Dough: Transfer the dough to a floured surface and knead for about 5 minutes, or until smooth and elastic.
5. Let it Rise: Place the dough in a lightly greased bowl, cover with a kitchen towel, and let it rise in a warm area for approximately 15 minutes.
6. Shape the Dough: Once risen, roll out the dough on a floured surface into a rectangular shape, about ½ inch thick.
7. Add Cheese and Seasoning: Sprinkle the shredded mozzarella and grated Parmesan cheese evenly over the top. Then, sprinkle garlic powder and Italian seasoning over the cheese.
8. Cut into Strips: Using a sharp knife or pizza cutter, slice the dough into strips about 1 inch wide.
9. Prepare for Baking: Place the strips on the prepared baking sheet. If desired, twist each strip slightly for an attractive look.
10. Brush with Butter: Melt butter and brush it over the tops of the breadsticks for extra flavor and a golden finish.
11. Bake: Bake in the preheated oven for 15-20 minutes or until golden brown and the cheese is bubbly.
12. Garnish: Once out of the oven, sprinkle with chopped fresh parsley or basil for a pop of color and flavor.
How to Serve
Serving your Homemade Cheesy Breadsticks can elevate the experience for everyone. Here are some ideas:
1. Presentation: Arrange the breadsticks in a basket lined with a cloth napkin for an inviting display.
2. Dipping Sauces: Offer a variety of dips, such as marinara sauce, garlic butter, or pesto, to complement the flavors.
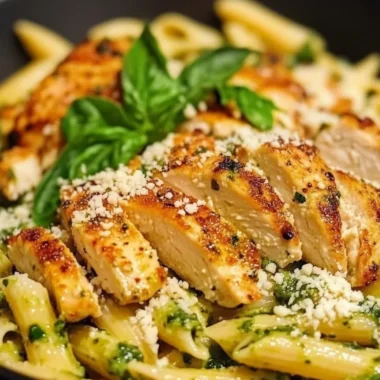
3. Pair with Meals: Serve alongside pasta dishes, salads, or soups for a more complete meal option.
4. Snack Time: These breadsticks are perfect for casual snacking during family movie nights or game days.
5. Garnish Options: Add a sprinkle of extra cheese or herbs on top right before serving for added visual appeal.
With these serving tips, you’ll create a delightful atmosphere around your Homemade Cheesy Breadsticks, leaving everyone wanting more! Enjoy every cheesy bite and the smiles they bring to your table.
Additional Tips
– Use Quality Flour: Opt for high-quality all-purpose flour to enhance the texture of your breadsticks.
– Experiment with Cheese: Try different cheese combinations, such as smoked gouda or pepper jack, for unique flavors.
– Let Dough Rise in a Warm Place: Preheat your oven for a few minutes, then turn it off and let the dough rise inside to create a warm environment.
– Brush with Garlic Butter: Elevate the flavor by mixing minced garlic into the butter before brushing it on the breadsticks.
– Don’t Skip the Herbs: Fresh herbs can significantly enhance the flavor profile. Add chopped fresh basil or parsley for a fragrant touch.
Recipe Variation
Switch up your Homemade Cheesy Breadsticks with these fun variations:
1. Stuffed Breadsticks: Fill the dough with mozzarella sticks or pepperoni slices before rolling it out for a cheesy surprise.
2. Herb-Infused Dough: Mix finely chopped fresh herbs directly into the dough for an additional burst of flavor.
3. Spicy Version: Incorporate diced jalapeños or red pepper flakes into the cheese mixture for a spicy kick.
4. Sweet Variation: For a dessert twist, use cinnamon and sugar with a drizzle of icing after baking.
Freezing and Storage
– Storage: Keep the breadsticks in an airtight container at room temperature for up to 3 days to maintain their freshness.
– Freezing: Freeze baked breadsticks in a single layer on a baking sheet. Once frozen, transfer them to a zip-lock bag. They can last for up to 2 months. When ready to eat, reheat them in the oven at 350°F (175°C) for about 10-15 minutes.
Special Equipment
To successfully make Homemade Cheesy Breadsticks, consider having these essential tools:
– Mixing Bowls: For combining ingredients effectively.
– Rolling Pin: To roll out your dough evenly.
– Baking Sheet: A sturdy surface to bake the breadsticks on.
– Parchment Paper: For easy cleanup and to prevent sticking.
– Pizza Cutter or Sharp Knife: For cutting the dough into strips accurately.
Frequently Asked Questions
Can I make the dough ahead of time?
Yes, you can prepare the dough a few hours in advance. Cover it and let it rise in the refrigerator. Just remember to let it come to room temperature before baking.
What’s the best cheese for cheesy breadsticks?
Mozzarella is popular for its meltability, but a blend of mozzarella, cheddar, and parmesan works wonderfully for added flavor.
Can I make these breadsticks gluten-free?
Yes, substitute the all-purpose flour with a gluten-free flour blend designed for baking.
What if my dough doesn’t rise?
Check the freshness of your yeast. If it’s expired, it may not activate properly. Ensure you’re using warm water, not hot, as heat can kill the yeast.
How can I keep these breadsticks warm for serving?
Cover the breadsticks with a clean kitchen towel or place them in a warm oven set to low heat until ready to serve.
Conclusion
Homemade Cheesy Breadsticks are a delightful treat that brings comfort and joy to any table. Their cheesy goodness and crispy texture make them a favorite for families and gatherings alike. Whether you choose to serve them fresh from the oven or customize them with your favorite ingredients, these breadsticks will surely impress. With simple ingredients and easy-to-follow steps, you’ll have a delicious snack or side dish that everyone will love. So gather your ingredients, roll up your sleeves, and prepare to savor the flavorful experience of Homemade Cheesy Breadsticks!
Homemade Cheesy Breadsticks: An Amazing Ultimate Recipe
- Total Time: 58 minute
Ingredients
– 2 cups all-purpose flour
– 1 tablespoon instant yeast
– 1 teaspoon sugar
– 1 teaspoon salt
– ¾ cup warm water (about 110°F)
– 1 tablespoon olive oil
– 1 cup shredded mozzarella cheese
– ½ cup grated Parmesan cheese
– 1 teaspoon garlic powder
– 1 teaspoon Italian seasoning
– 2 tablespoons melted butter (for brushing)
– Fresh parsley or basil (for garnish, optional)
Instructions
Making Homemade Cheesy Breadsticks is a breeze when you follow these step-by-step instructions:
1. Preheat your oven to 425°F (220°C). Line a baking sheet with parchment paper for easy removal of the breadsticks.
2. Mix Dry Ingredients: In a large mixing bowl, combine the all-purpose flour, instant yeast, sugar, and salt. Mix well until uniformly blended.
3. Add Wet Ingredients: Slowly pour warm water and olive oil into the dry ingredients. Stir until a dough begins to form.
4. Knead the Dough: Transfer the dough to a floured surface and knead for about 5 minutes, or until smooth and elastic.
5. Let it Rise: Place the dough in a lightly greased bowl, cover with a kitchen towel, and let it rise in a warm area for approximately 15 minutes.
6. Shape the Dough: Once risen, roll out the dough on a floured surface into a rectangular shape, about ½ inch thick.
7. Add Cheese and Seasoning: Sprinkle the shredded mozzarella and grated Parmesan cheese evenly over the top. Then, sprinkle garlic powder and Italian seasoning over the cheese.
8. Cut into Strips: Using a sharp knife or pizza cutter, slice the dough into strips about 1 inch wide.
9. Prepare for Baking: Place the strips on the prepared baking sheet. If desired, twist each strip slightly for an attractive look.
10. Brush with Butter: Melt butter and brush it over the tops of the breadsticks for extra flavor and a golden finish.
11. Bake: Bake in the preheated oven for 15-20 minutes or until golden brown and the cheese is bubbly.
12. Garnish: Once out of the oven, sprinkle with chopped fresh parsley or basil for a pop of color and flavor.
- Prep Time: 20 minutes
- Cook Time: 15-20 minutes
Nutrition
- Serving Size: 8 breadsticks
- Calories: 210 kcal per breadstick
- Fat: 8g
- Protein: 8g